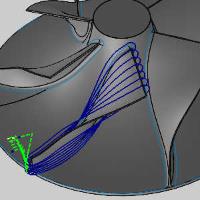
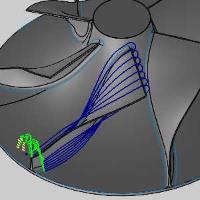
Surface paths: Multiblade
Introduction
This topic will explain the options found in the Surface paths tab of the Multiblade operation.
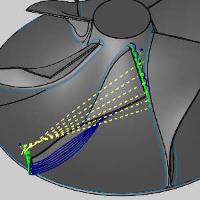
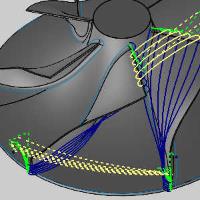
Surface paths
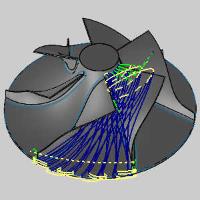
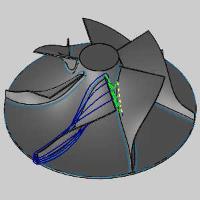
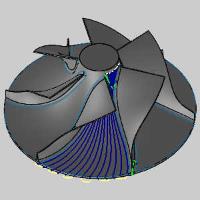
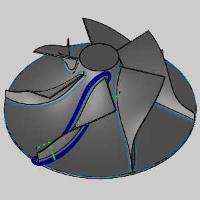
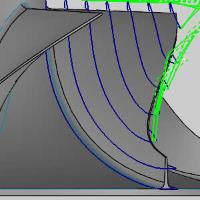
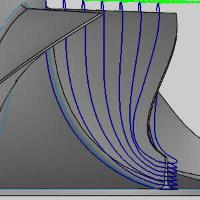
The Surface paths tab allows you to control the pattern and the ordering of the cuts as well as the depth step and stepover.
Pattern
- Machining- defines the purpose of the operation by allowing you to select either:
- Roughing - removes the bulk of the material.
- Blade finishing - creates finishing passes on the blades.
- Hub finishing - creates finishing passes on the hub.
- Fillet finishing - creates finishing passes on the fillets between the hub and the blades.
- Roughing - removes the bulk of the material.
- Strategy- defines how the Roughing, or Blade finishing is handled.
- Offset from hub - creates the depth positions based on offsets from the curve of the hub.
- Offset from shroud - creates the depth positions based on offsets from the curve of the shroud.
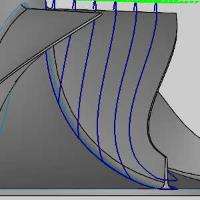
- Morph between shroud and hub - creates the depth positions based on offsets from the shroud and hub that are each blended in such a way that they share a common curve between them.
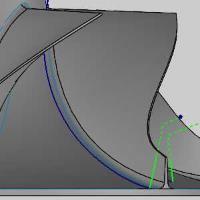
- Swarf - creates a finish on the blades by applying swarf cuts to them.
- Offset from hub - creates the depth positions based on offsets from the curve of the hub.
Important: When applying the Swarf Strategy to the Blade finishing pattern, it is necessary to exclude the shroud from the select geometry. Otherwise you will receive error: Exception raised in calculation routine ( Could not generate swarf milling tool path. Please verify the input data.)
The Fillet should also be excluded from geometry selection.
- Contour - defines how where to cut when finishing blades and fillets.
- Full - applies toolpath around all of the blade or fillet.
- Full (trim trailing edge) - applies toolpath around all of the blade or fillet, but trims the edge at the widest portion.
- Full (trim trailing/leading edges) - applies toolpath to each side of the blade or fillet, but trims the edges connecting them.
- Left side - applies toolpath only to the left side of the blade or fillet.
- Right side - applies toolpath only to the right side of the blade or fillet.
- Pocket - applies toolpath to the facing sides of two blades when using blade finishing.
- Full - applies toolpath around all of the blade or fillet.
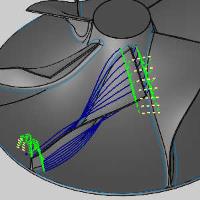
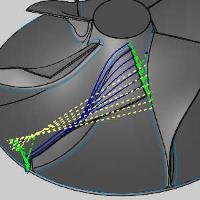
Sorting
-
Method - defines how the cuts move.
-
One way, start from leading edge - machines in one direction beginning at the narrow end.
-
One way, start from trailing edge - machines in one direction beginning at the wide end.
-
Zig-zag, start from leading edge - machines in both directions beginning at the narrow end.
-
Zig-zag, start from trailing edge - machines in both directions beginning at the wide end.
-
Spiral, start from leading edge - machines in a spiral beginning at the narrow end when finishing the blade or fillet.
-
Spiral, start from trailing edge - machines in a spiral beginning at the wide end when finishing the blade or fillet.
-
Ordering - defines the sequencing of the cuts.
-
Left to right- ensures that the cuts for the Roughing and Hub finishing begin on the left and move to the right.
-
Right to left- ensures that the cuts for the Roughing and Hub finishing begin on the right and move to the left.
-
From center away- ensures that the one way cuts for the Roughing and Hub finishing begin in the center and work out.
-
From center away, climb- ensures that the zig-zag cuts for the Roughing and Hub finishing begin in the center and utilize a climb cut in an outward direction.
-
From center away, conventional- ensures that the zig-zag cuts for the Roughing and Hub finishing begin in the center and utilize a conventional cut in an outward direction.
-
Top down - ensures the cuts begin against the blade and move toward the hub for fillet finishing.
-
Bottom up - ensures the cuts begin against the hub and move toward the blade for fillet finishing.
-
Inside to outside - ensure the cuts begin in the center and move toward the outermost cuts for fillet finishing.
-
Outside to inside - ensure the cuts begin on the outside and move toward the innermost cuts for fillet finishing.
-
-
Cut direction - When using fillet or blade finishing, you can choose between.
-
Climb - ensures a climb cut is applied for Blade and Fillet finishing.
-
Conventional - ensures a conventional cut is applied for Blade and Fillet finishing.
-
Depth Step
To define the depth steps of the Roughing and Blade finishing, select one of the following two options:
-
 Maximum number - sets a limit on the number of cuts to apply.
 -
 Maximum distance - allows the distance to dictate the number of cuts.
 -
Distance - sets the distance between cuts.
Stepover
To define the stepover of the Roughing and Hub finishing, select one of the following two options:
-
Maximum number - sets a limit on the number of cuts to apply.
-
Maximum distance - allows the distance to dictate the number of cuts.
Area
When Roughing or Blade finishing using the Morph between shroud and hub strategy, this option will allow you to limit the area of cut.
- Start at (%) - determines where to start the cuts based on the outermost portion of the blade being 0%, and the innermost portion of the blade being 100%.
- End at (%) - determines where to end the cuts based on the outermost portion of the blade being 0%, and the innermost portion of the blade being 100%.
Both sides
When using Fillet finishing, this group allows you to set the number of cuts and the distance between those cuts.
- Number of cuts - determines the number of cuts to make on each fillet.
- Distance - determines the distance between each cut.
First cut
The First cut options are designed to control the first cut in which the tool has full engagement for Roughing and Hub finishing.
- Intermediate slices - creates additional depths on the first slice.
- Depth step - allows you to specify a depth step on the intermediate slices for Hub finishing.
- First cut feed rate %
 - The first cut will use the same feedrate as the remaining cuts.
 - The first cut will use a feedrate which varies from the remaining cuts by the percentage entered.
Final cuts
The Final cuts options are designed to control the last cuts of the Roughing.
- Number of final cuts - creates additional cuts on the final depth.
- Final cut stepover - allows you to specify a stepover specific to the final depth.
- Final cut feed rate %
- The final cut will use the same feedrate as the previous cuts. - The final cut will use a feedrate which varies from the previous cuts by the percentage entered.